In summary:
- Switching from canned to dried beans is a strategic system that can cut your costs by over three times and significantly reduce sodium intake.
- Mastering quick-soak methods and Instant Pot cooking eliminates the biggest time barriers, making dried legumes practical for busy weeknights.
- Safe handling is critical, especially for red kidney beans, which must be boiled for at least 10 minutes to neutralize toxins.
- The key to weekly success is “component prepping”: cooking a large, neutral batch of legumes to season fresh for different meals, preventing flavor fatigue.
The familiar clank of a can opener and the splash of beans into a colander is a sound many home cooks know well. Canned beans are the undisputed champion of convenience, but that convenience comes at a steep price—both to your wallet and your health. For the budget-conscious meal prepper, the reliance on canned goods presents a frustrating dilemma: you’re paying a premium for a product often loaded with sodium and preservatives, undermining your goals of eating economically and healthily.
The common advice is to simply rinse canned beans thoroughly, and while this helps, it doesn’t solve the core issues of cost and inferior texture. What if the solution wasn’t just to manage the downsides of canned goods, but to bypass them entirely? The real secret to unlocking massive savings, superior flavor, and complete nutritional control lies in building a simple, efficient system around dried legumes. This isn’t just about learning to cook beans; it’s about transforming your pantry into a powerhouse of frugal, healthy meal components.
This guide moves beyond the simple “soak overnight” platitude. We’ll dismantle the cost difference, provide solutions for when you’re short on time, and establish clear safety protocols. By the end, you’ll have a complete framework for making dried legumes the most versatile and cost-effective workhorse in your kitchen, turning a humble bag of beans into a week’s worth of delicious, healthy meals.
To help you navigate this comprehensive system, this article breaks down the process into clear, actionable stages. From understanding the economics to mastering the cooking techniques and strategic planning, here is the roadmap to becoming a dried legume expert.
Summary: The Frugal Prepper’s Guide to Dried Legumes: From Pantry to Plate
- Why Dried Beans Cost 3 Times Less Than Canned Alternatives?
- How to Quick-Soak Dried Legumes When You Forgot Overnight Prep?
- Lentils vs. Kidney Beans: Which Is Better for Quick Weeknight Dinners?
- The Red Kidney Bean Mistake That Can Cause Food Poisoning
- Cooking Times for 5 Common Legumes in an Instant Pot
- Cooking with Whole Food Ingredients: 5 Rules for Maximum Flavor Retention
- Strategic Meal Planning for Busy Professionals: Saving 5 Hours Per Week
- How to Cook Nutrient-Rich Tempeh Without the Bitter Aftertaste?
Why Dried Beans Cost 3 Times Less Than Canned Alternatives?
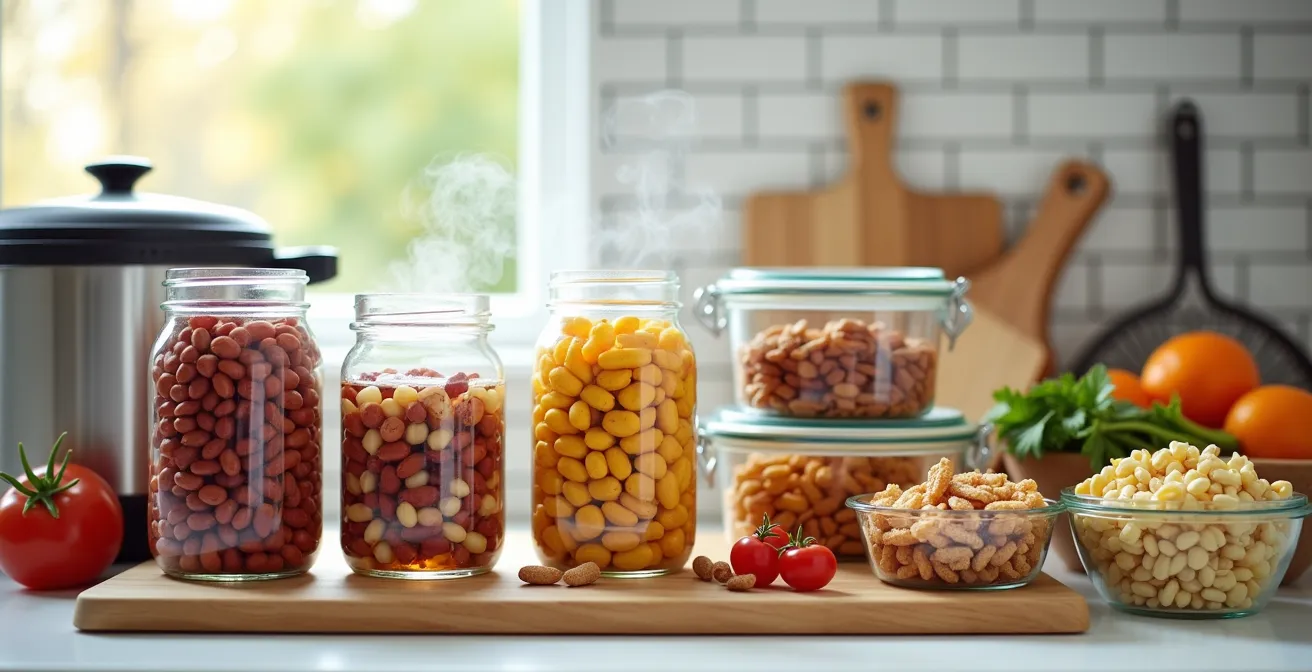
The most compelling reason to switch to dried legumes is the dramatic impact on your grocery bill. While the shelf price of a single bag might seem higher than a can, the value is revealed when you look at the cost-per-serving. The canning process involves water, salt, processing, packaging, and shipping weight, all of which add to the final cost. Dried beans, on the other hand, are a dense, unprocessed product with minimal overhead. This fundamental difference leads to staggering savings over time.
A recent cost analysis demonstrates that dried beans are 3.12 times cheaper than their canned counterparts, costing just $0.51 per pound compared to $1.59 for the equivalent amount of canned beans. This isn’t a small rounding error; it’s a fundamental economic advantage. For a family that incorporates beans into their weekly menu, these savings add up quickly. It has been shown that a family of four eating beans once a week could save nearly $80 per year just by making this simple switch. This “bean dividend” can then be reallocated to other parts of your food budget.
To maximize these savings, a smart purchasing strategy is key. Here’s how to build your cost-effective pantry system:
- Start with Bulk Bins: Your local grocery store’s bulk bins are often the cheapest source for common beans like black beans, pinto beans, and lentils. This allows you to buy exactly what you need.
- Scale Up to Bags: For legumes you use frequently, ordering 5-pound bags online or from warehouse clubs can offer an even better per-pound price.
- Understand the Yield: One pound of dried beans will yield the equivalent of four to five 15-ounce cans of cooked beans. This is the core of the value proposition.
- Portion for Convenience: After batch-cooking, store your beans in freezer bags or containers portioned at around 240g (or 1.5 cups), which is the standard drained weight of one can. Label and date each portion for grab-and-go meal prep.
By treating dried beans as a bulk commodity rather than a one-off purchase, you create an incredibly resilient and economical food foundation. This initial investment in building a “pantry system” pays for itself within just a few meals.
How to Quick-Soak Dried Legumes When You Forgot Overnight Prep?
The number one barrier for most people new to dried beans is the planning required for an overnight soak. The panic of realizing at 5 PM that your beans are still rock-hard is real. Fortunately, forgetting to soak doesn’t mean you have to abandon your meal plan. The quick-soak method is a reliable workaround that significantly speeds up the hydration process, turning an 8-hour wait into a manageable 1-hour task.
While the traditional cold-water soak is great for achieving the most even texture, a quick soak is an indispensable tool for the busy cook. Here’s the most common and effective technique:
- Rinse and Sort: First, always rinse your beans in a colander and quickly sort through them to remove any small stones or debris.
- Cover with Water: Place the beans in a large pot and cover them with about 2-3 inches of cold water.
- Boil and Rest: Bring the water to a rolling boil. Let it boil for 2-3 minutes, then turn off the heat, cover the pot with a tight-fitting lid, and let the beans stand for at least one hour.
- Drain and Rinse: After an hour, drain the soaking water (which can contain compounds that cause digestive upset) and give the beans a final rinse. They are now hydrated and ready to be cooked according to your recipe.
This process effectively jump-starts hydration, making the beans tender and ready for cooking in a fraction of the time. For those in an even bigger time crunch, some legumes don’t require any soaking at all. Lentils (red, brown, and green) and split peas are fantastic for last-minute meals. They cook quickly—often in just 20-30 minutes on the stovetop—and absorb flavors beautifully, making them perfect for spontaneous soups, dals, and stews.
Lentils vs. Kidney Beans: Which Is Better for Quick Weeknight Dinners?
Not all legumes are created equal, especially when time is of the essence. On a busy Tuesday night, the choice between different types of dried legumes can be the difference between a home-cooked meal and resorting to takeout. The two ends of the speed spectrum are perfectly represented by lentils and kidney beans. Understanding their distinct characteristics is key to strategic meal planning.
Lentils are the sprinters of the legume world. They require no soaking and cook quickly, making them an ideal choice for fast weeknight dinners. Their porous texture allows them to absorb spices and aromas rapidly. Kidney beans, by contrast, are marathon runners. Their dense structure and thick skins necessitate a long soak and a much longer cooking time, making them better suited for weekend batch-cooking projects like chili or large stews where their robust shape holds up well.
This comparative table breaks down the key differences for a time-crunched cook.
| Factor | Lentils | Kidney Beans |
|---|---|---|
| Soaking Required | No soaking needed | 8-12 hours overnight |
| Cooking Time (Instant Pot) | No data available | 8 minutes (soaked) |
| Stovetop Cooking | 20-25 minutes | 60-90 minutes (after soaking) |
| Flavor Absorption | Quick, porous texture | Dense, requires longer simmering |
| Best For | Quick curries, soups | Batch-cooked chilis, stews |
The data clearly shows that for a quick meal, lentils are the undisputed winner. As Petra from Nutrition Refined notes in her How to Cook Dried Legumes Guide, their speed and texture are a major advantage. In her guide she states:
I love lentils for their short cooking time. I use them in stews, dals, and soups because they are nicely soft after cooking.
– Petra, Nutrition Refined
This isn’t to say kidney beans don’t have their place. Their firm texture is essential for meals where you want the beans to remain distinct and whole. The takeaway for the savvy meal prepper is to use the right tool for the job: lentils for speed during the week, and kidney beans for structure in make-ahead weekend batches.
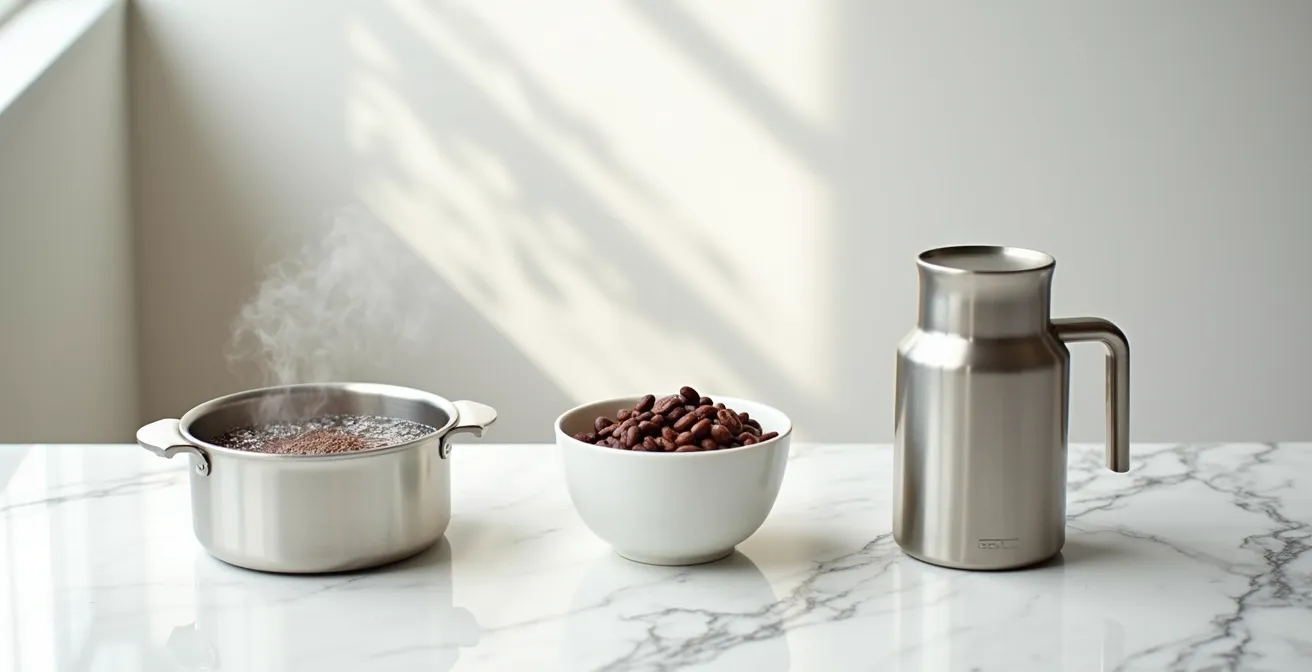
The Red Kidney Bean Mistake That Can Cause Food Poisoning
While dried legumes are a cornerstone of a healthy, frugal diet, there is one critical safety warning that every home cook must know: improperly cooked red kidney beans can cause food poisoning. This is not an old wives’ tale; it is a scientifically documented risk due to a natural toxin called Phytohaemagglutinin (PHA). This lectin is found in many beans but is present in exceptionally high concentrations in red kidney beans.
The most dangerous mistake is cooking them in a slow cooker on a low setting. Temperatures below boiling (100°C / 212°F) are not sufficient to destroy the PHA toxin. In fact, cooking at lower temperatures can increase the toxicity of the beans, making them even more dangerous than if they were eaten raw. Symptoms of PHA poisoning include severe nausea, vomiting, and diarrhea, typically appearing within a few hours of consumption.
Fortunately, making red kidney beans completely safe is simple, as long as you follow a non-negotiable protocol. Boiling the beans vigorously is the only way to ensure the toxin is neutralized. This process must be followed every single time you cook them from a dried state.
Your Action Plan: Foolproof Safety Checklist for Red Kidney Beans
- Soak Thoroughly: Soak beans for at least 5 hours in cold water. Crucially, you must discard this soaking water as it can contain leached toxins.
- Rinse Again: After soaking, rinse the beans thoroughly under fresh, cold running water to wash away any residual compounds.
- Bring to a Rolling Boil: Place the rinsed beans in a pot, cover with fresh water, and bring them to a full, rolling boil.
- Boil Hard for 10 Minutes: This is the most critical step. You must maintain a hard, vigorous boil for a minimum of 10 minutes. This sustained high heat is what destroys the PHA toxin.
- Simmer Until Tender: After boiling for 10 minutes, you can then reduce the heat and simmer the beans until they reach the desired tenderness. Never use a slow cooker on a ‘low’ or ‘warm’ setting for the initial cooking phase.
This information isn’t meant to scare you away from red kidney beans, which are a delicious and nutritious food. It is meant to empower you with the knowledge to prepare them safely, reinforcing that your kitchen system must prioritize both economy and well-being. According to food safety experts, following this boiling step is the most reliable way to enjoy them without risk, as highlighted in a guide on cooking dried legumes for meal prep.
Cooking Times for 5 Common Legumes in an Instant Pot
Once you’ve embraced the economy of dried beans, the next step is to optimize the cooking process for speed. This is where a pressure cooker, particularly an Instant Pot, becomes a meal prepper’s most valuable ally. It dramatically reduces cooking times compared to the stovetop, turning a multi-hour simmer into a hands-off, minutes-long task. This “time arbitrage” is a core component of an efficient pantry system, allowing you to batch-cook a week’s worth of legumes in under an hour.
However, pressure cooking is a science. Different legumes require different cooking times to achieve the perfect texture. Overcooking can result in mushy beans unsuitable for salads, while undercooking leaves them unpleasantly hard. The key is to know the right timing for your desired outcome. For example, a shorter cooking time for chickpeas yields firm beans perfect for tossing into salads, while a few extra minutes will produce the creamy texture needed for smooth, homemade hummus.
Here is a practical cheat sheet for cooking five of the most common legumes in an Instant Pot after they have been soaked overnight. All times are for cooking on high pressure.
| Legume Type | Soaked Time Range | Texture Result | Best Use |
|---|---|---|---|
| Black-eyed Peas | 4-5 minutes | Tender | Salads, sides |
| Black Beans | 6-8 minutes | Firm to creamy | Tacos, bowls |
| Chickpeas | 10-15 minutes | 12 min = firm for salads 15 min = creamy for hummus |
Variable based on time |
| Kidney Beans | 8-10 minutes | Tender with intact skins | Chilis, stews |
| White Beans | 7-9 minutes | Creamy | Soups, dips |
After the cooking cycle is complete, always allow the pressure to release naturally for at least 10-15 minutes. A “quick release” can cause the bean skins to split and is best reserved for when you want a mushier texture, like for refried beans. Mastering these timings transforms your Instant Pot from a simple appliance into a precision tool for building your meal prep components.
Cooking with Whole Food Ingredients: 5 Rules for Maximum Flavor Retention
Moving from canned to dried beans isn’t just an economic upgrade; it’s a culinary one. You gain complete control over the final product, allowing you to build a deep “flavor infrastructure” that canned beans simply cannot match. The key is to stop thinking of cooking beans as a chore and start seeing it as the first step in creating flavor. By following a few simple rules, you can ensure your beans are not just cooked, but perfectly seasoned, creamy, and delicious from the inside out.
Many people make common mistakes that sabotage texture and taste, such as discarding the cooking liquid or adding acidic ingredients too early. The liquid beans are cooked in, often called “bean broth” or “aquafaba” for chickpeas, is packed with starch and flavor—a valuable ingredient in its own right. Similarly, a common myth is that salting beans early makes them tough; in reality, it helps season them evenly and produces creamier beans with more intact skins.
To get the most out of every batch, follow these five essential rules for flavorful cooking:
- Never Discard the Cooking Liquid: This “liquid gold” is a fantastic broth for soups, a flavorful cooking liquid for grains like rice or quinoa, or a base for sauces and gravies.
- Salt Beans from the Start: Add salt to the soaking water and the cooking water. This seasons the beans evenly and helps create a tender, creamy interior while keeping the skins intact.
- Build an Aromatic Raft: Add flavor-boosting ingredients to the pot while the beans cook. A piece of kombu seaweed (adds umami and helps soften beans), a few dried shiitake mushrooms, half an onion studded with cloves, or a bay leaf will create a complex, savory foundation.
- Start Beans in Cold Water: Always start your beans in cold water and bring them to a simmer slowly. This ensures they cook evenly from the outside in, preventing split skins and mushy exteriors with hard centers.
- Add Acidic Ingredients Last: Ingredients like tomatoes, vinegar, or lemon juice can prevent beans from becoming tender if added too early. Always wait until the beans are fully cooked and soft before stirring in any acidic components.
By applying these principles, you transform a simple pot of beans into a versatile, flavor-packed component. You’re not just making beans; you’re creating a foundational element for countless future meals.
Strategic Meal Planning for Busy Professionals: Saving 5 Hours Per Week
The true power of batch-cooking dried legumes is realized when it’s integrated into a strategic weekly meal plan. This is where you cash in on your “time arbitrage”—the small investment of time on the weekend pays huge dividends during the busy workweek. The goal is not to eat the same boring pot of chili all week, but to use your perfectly cooked beans as a versatile base for a variety of quick, fresh, and exciting meals.
The secret to avoiding “leftover fatigue” is a technique known as component prepping. Instead of making a finished dish, you cook a large, neutral batch of your chosen legume (like black beans or chickpeas). Store them in the fridge for up to 4 days or in the freezer for up to 3 months. Then, on serving day, you transform a portion into a “new” meal by adding fresh finishers. A scoop of black beans can become part of a taco salad with fresh lime and cilantro one day, and a hearty soup with chili oil the next. This approach keeps meals feeling fresh and spontaneous.
To further streamline your week, consider creating “power couples” by pairing your batch-cooked legumes with a complementary grain. This gives you an instant, nutrient-dense base for salads, bowls, and sides.
| Legume | Best Grain Pairing | Meal Type | Prep Time Saved |
|---|---|---|---|
| Black Beans | Quinoa | Mexican Bowls | 45 min/week |
| Lentils | Barley | Hearty Soups | 60 min/week |
| Chickpeas | Couscous | Mediterranean Salads | 30 min/week |
| White Beans | Farro | Italian Soups | 50 min/week |
| Kidney Beans | Brown Rice | Chili & Stews | 70 min/week |
This system of batching core components allows you to assemble healthy, satisfying meals in minutes rather than cooking from scratch every night. By front-loading the work of cooking the legumes, you reclaim hours of valuable time during the week, making healthy, frugal eating a sustainable reality even for the busiest professionals.
Key takeaways
- Switching to a dried legume system offers dramatic cost savings (over 3x cheaper) and better nutritional control compared to canned goods.
- Safety is paramount: Red kidney beans must be boiled vigorously for a minimum of 10 minutes to neutralize the natural toxin PHA.
- “Component prepping”—batch-cooking neutral beans and seasoning them fresh for each meal—is the most effective strategy to save time and prevent meal fatigue.
How to Cook Nutrient-Rich Tempeh Without the Bitter Aftertaste?
Once you’ve mastered the art of cooking dried beans, you can level up your legume skills by exploring other versatile soy products like tempeh. Tempeh is a nutrient-dense cake of fermented soybeans, prized for its firm, chewy texture and high protein content. However, many people are put off by its sometimes-bitter aftertaste, which comes from the natural fermentation process. Just like with dried beans, a simple preparation technique is all it takes to unlock its delicious, nutty flavor.
The key to removing the bitterness is a quick steaming or simmering process. This simple step mellows out the strong fermentation notes and makes the tempeh more porous, allowing it to better absorb marinades. Skipping this step is the most common mistake and often results in a disappointing meal. By investing just 10 minutes in this prep, you create a perfect blank canvas for flavor.
Here is the simple, three-step process to prepare perfect, flavor-packed tempeh every time:
- Step 1: Steam or Simmer to Debitter. Place the entire block of tempeh in a steamer basket or a saucepan with a half-inch of simmering water. Cover and let it steam for 10 minutes. This releases the bitter compounds and softens the tempeh.
- Step 2: Brown for Nutty Flavor. After steaming, pat the tempeh dry and slice, cube, or crumble it. Dry sauté it in a non-stick skillet over medium heat until it’s golden brown on all sides. This step is crucial for developing a rich, nutty flavor and a more appealing texture.
- Step 3: Marinate for Taste. Now that the tempeh is prepped, it’s ready to absorb flavor. Toss the browned tempeh in your favorite marinade. A universal formula that works well is a balanced mix of 1 part umami (soy sauce/tamari), 1 part acid (vinegar/lime juice), 1 part sweet (maple syrup/agave), and aromatics like garlic or ginger.
Once marinated, the tempeh is ready to be used in stir-fries, sandwiches, salads, or bowls. By mastering this technique, you add another incredibly versatile, low-cost protein to your meal prep arsenal, expanding your pantry system beyond just beans and lentils.
Now that you have the complete system—from purchasing and prep to cooking and planning—the next step is to put it into action. Start small this week: pick one type of legume, batch-cook it using these methods, and see how it transforms your meals.